


 7046
7046
Departments now have access to a copy tool that may help the appointment submission go more quickly.
Follow the steps below to copy appointments from a previous term into the upcoming term during the submission window.
Step 1: Log into the system and go to the Appointment History Section. If the appointment submission window is open, you may choose a term/year and a department to begin the copy process.

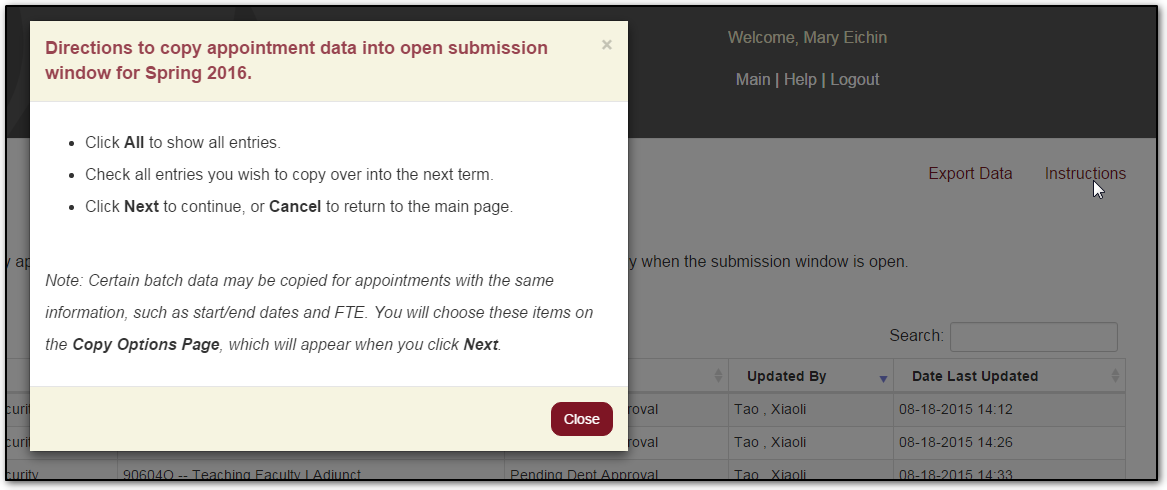
Step 2: Click the Instructions link on the right side of the page. Follow the instructions listed in the pop-up instructions page.
- Click All to show all entries.
- Check the entries you wish to copy over into the next term.
- Click Next to continue or Cancel to return to the main page.
 The copy tool will automatically copy the following:
- Appointment name
- EMPLID
- FSUID
- Supervisor
- Job code information
Certain batch data may be copied for appointments with the same information. You will choose these items on the Copy Options Page, which will appear when you click Next.
- ODL or department HR entry*
- FTE
- Dual Comp*
- Start/end dates
*required fields for copy options
Step 3: If you wish to supply additional data to be copied into all the selected appointments, click Yes, complete the form, and click Submit. If not, click No, then Submit. You may click Cancel at this time to go back to the main page and begin again.
Please note: You can copy appointments in sets in order to make best use of the copy options. For instance, you may copy over all the TA’s that have the same FTE and/or start and end dates. Then go back and copy over other TA’s that may all have a different FTE. Or copy over all faculty that are dual comp, etc.
Using the copy options means less data entry for you as you work towards submitting your appointments for the upcoming term.
After you have clicked Submit, you will see a confirmation page.
Return to the main page to complete submission in the Upcoming Appointments section.
Step 4: Click on the department and click Submit.
Step 5: You will see the gold shaded appointments that have been copied over. Click on the appointment name link to complete the entry.
Click Edit in each section to fill in the rest of the required information. You must always enter the budget information, distribution, and total pay of the appointment.
Please be sure to also complete course information required to process the DL appointment request! You may add additional text in the comments field.
Step 6: Click Add New Appointment to add an appointment that was not copied from a previous term.


