


 259
259
1. Access the course that you wish to create a syllabus page for by clicking on the Dashboard icon in the Global Navigation Menu, or by clicking on the Courses icon in the Global Navigation Menu and then click the All Courses link.

2. Click the Syllabus link located in your Course Navigation links and select the Edit icon.
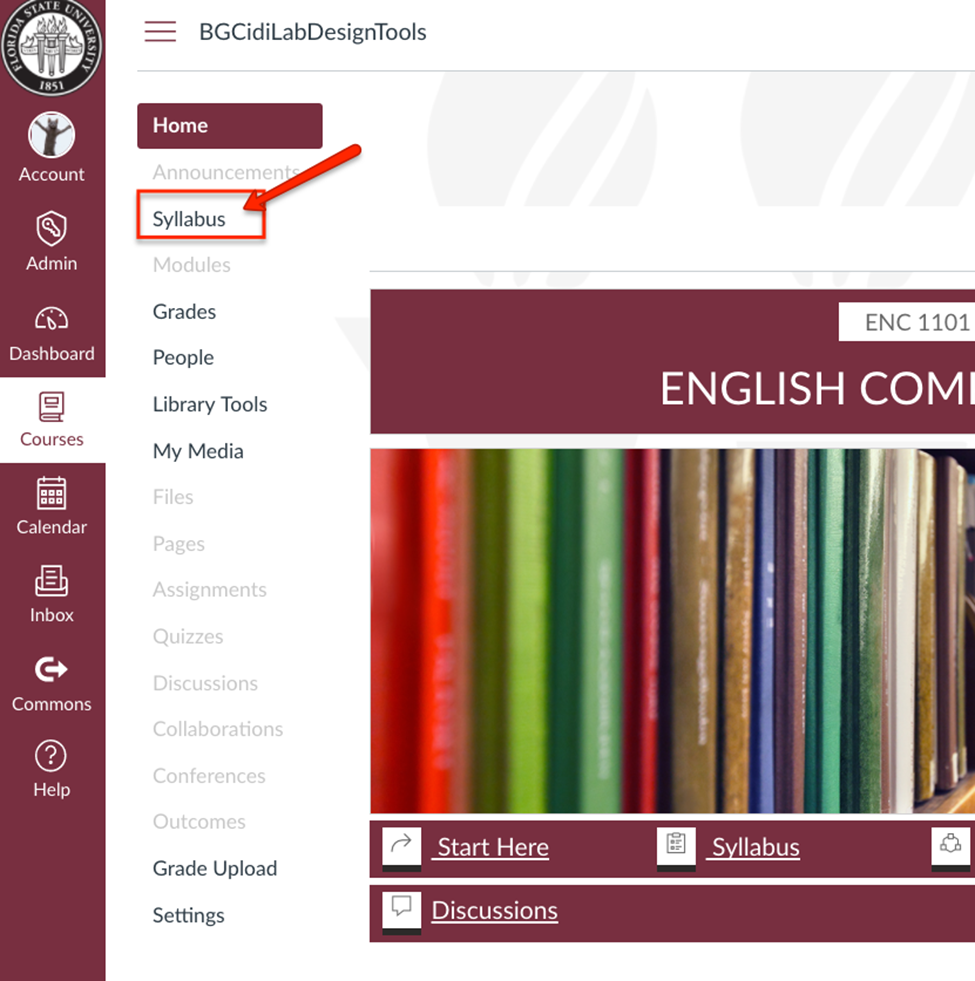
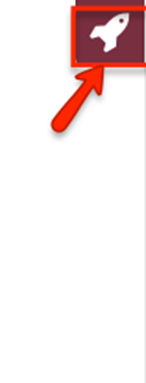
3. Launch DesignPLUS Tools by clicking the rocket ship icon in the upper-right corner (this icon appears anywhere you can click edit and use the rich content editor).
Quick tip: You may also use the keyboard shortcut: Alt + Shift + D
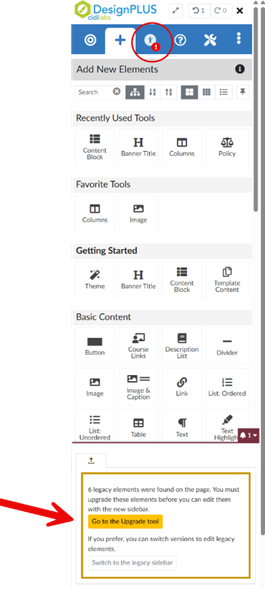
Cidi Labs DesignPLUS Tools should now be opened and located on the right-hand side of the page.
Note: You may need to upgrade your content to be compatible with the DesignPLUS sidebar. You will see this notification if you need to upgrade.
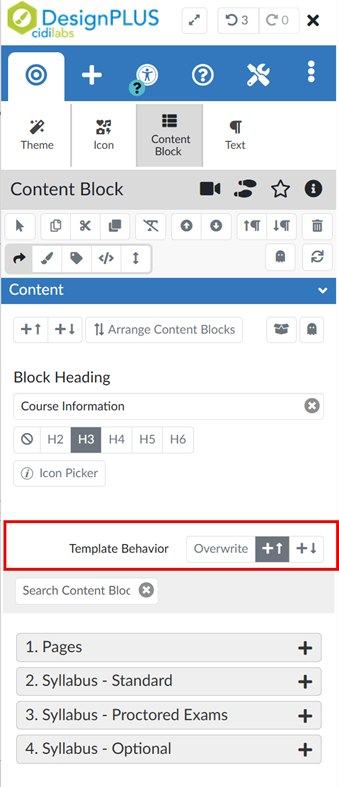
4. Move your cursor into a content block and select the pre-built syllabus content blocks from the “Syllabus” section.
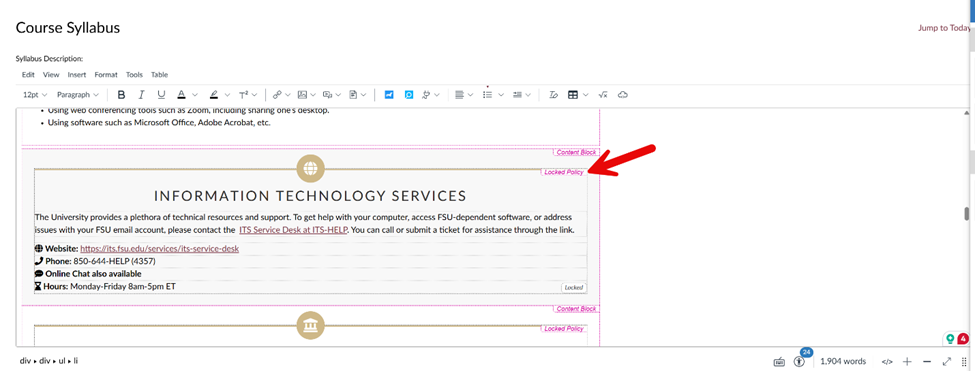
Note: All blocks in “Syllabus – Standard” are included in the syllabus template. There are also proctored exam blocks and optional blocks for instructors using proctors, needing to insert an AI policy, and more. Language has been updated for several content blocks, so you may want to replace blocks that you already have to ensure that you have the latest language. New blocks have also been included, like an Information Technology Services block, with contact information for ITS support.
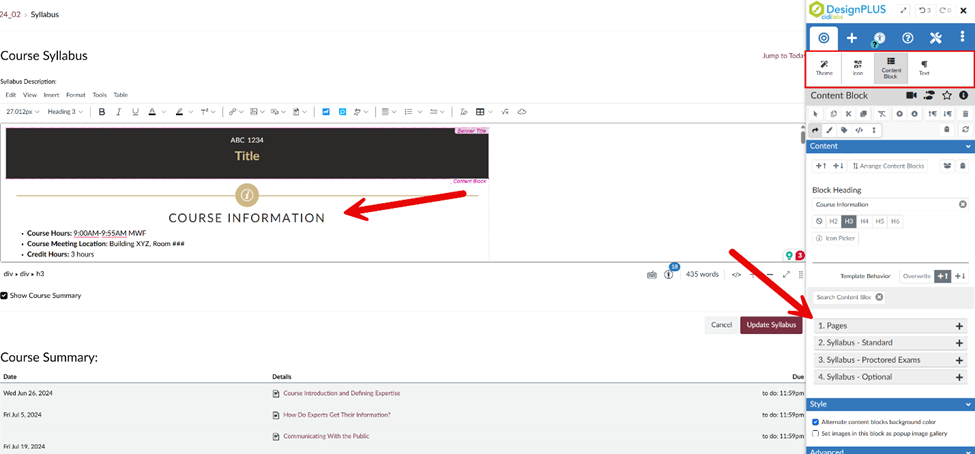
Note: Pay attention to the “Template Behavior” section for how these blocks will be inserted into your syllabus. You can overwrite existing blocks, or add new blocks above or below where your cursor is located.
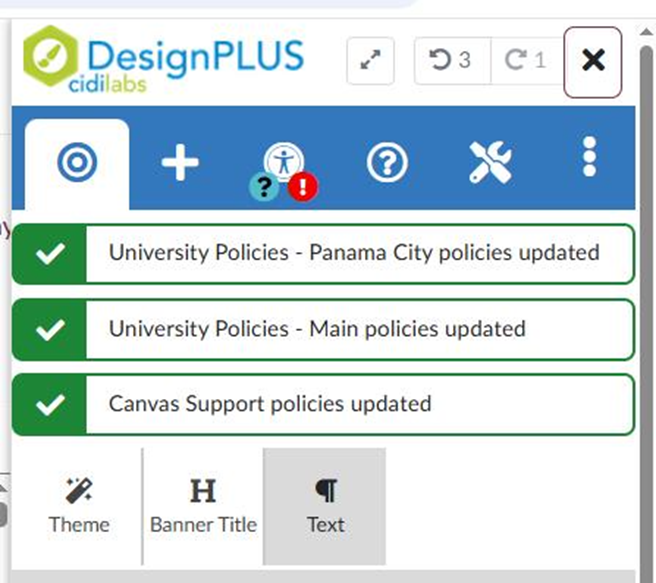
5. Auto Updates and Policy Blocks: You will want to ensure you include the University Policy block from the DesignPLUS sidebar, even if you already have one, by adding the newest version you will ensure that it automatically updates each term with any potential updates and new language.
Note: Any block that says (locked policy) will automatically update every time you launch the DesignPLUS sidebar (rocket ship). You will get a notification that these have been updated.
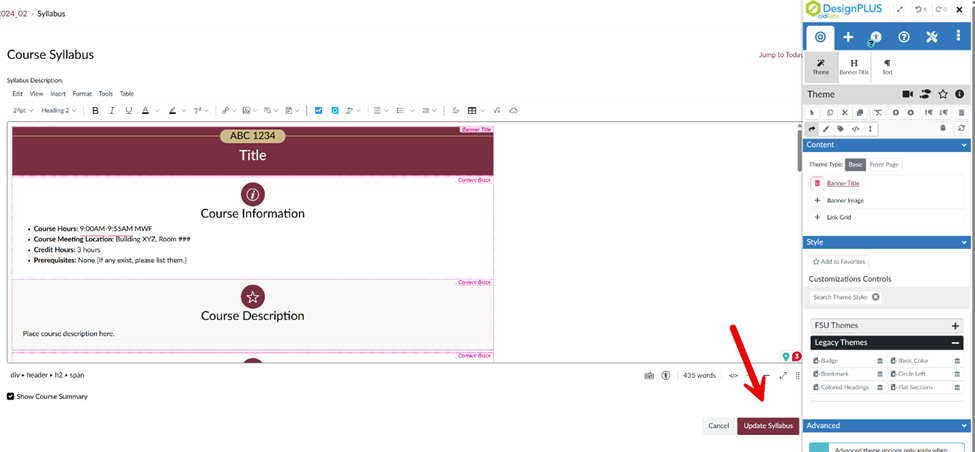
6. Be sure to select update syllabus or save page once you have made all updates.
Once you have added the desired content blocks, you can rearrange the order in which they appear in your syllabus. Please see the Managing Content Blocks article for more information.
Please be aware that any changes made to this syllabus page are permanent once you select the Update Syllabus button. Please make sure that any changes you wish to make to your syllabus page are intentional, as recovering a syllabus page in Canvas is difficult.


